Monday, April 25, 2011

Visiting Jason's Ranch.

I totally can't believe I forgot to post these photos!! ACK! Sorry... they are a bit old now. I won't even tell you how long. LOL. :-p But it was COOOOOLD, so it wasn't recently. ;-)

Anywho, I met Jason when I was 16. He was 8. I was an elementary teacher's aide for a class next door to his, and one day the total-sweetie-that-he-is held the door open for me. I signed "thank you very much!" to him, and he FREAKED OUT. LOL. :-D I'm talking *jumping-up-and-down* excited! Heee!

I was, seriously, like one of only five people he'd met (in his life!) who could Sign, and that stoked him out. (Yes, we lived in a VERY small town.) I became his babysitter and Sign Language translator at church after that (no, I'm not a certified translator; I've just always loved to Sign), and I continued doing that through college (whenever I was home...). Now he's grown and graduated from college too. (How did THAT happen!??!?)

He invited me out to his family's ranch (only two hours north of me) one day, and I jumped at the chance to see him!

{You may or may not be able to tell that I'm wearing... like... four VERY warm layers.}

We jumped in the ranch-vehicle-thingy (yes, that's it's technical name) and headed out to meet and feed the cows...

They heard us and came running. They knew it was time to eat, I guess! ;-) They had some HUGE longhorns...

And some little baby guys too... (awwwww!)

He asked if I wanted to get out and help feed. Umm... no. I'll stay in the vehicle *away* from the stampeding cattle, thankyouverymuch. :-)

I'm pretty sure this caramel-colored cow loved me...

Or the camera? LOL. Not sure, but she (he? she?) was *always* looking at me, and honestly, trying to get as close as possible to me! LOL.

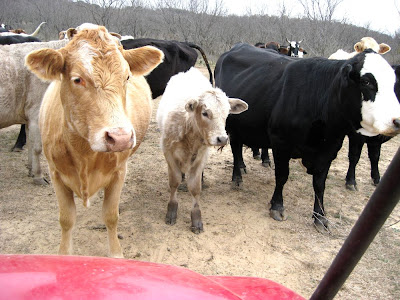
See?! Love, I tell ya! ;-)

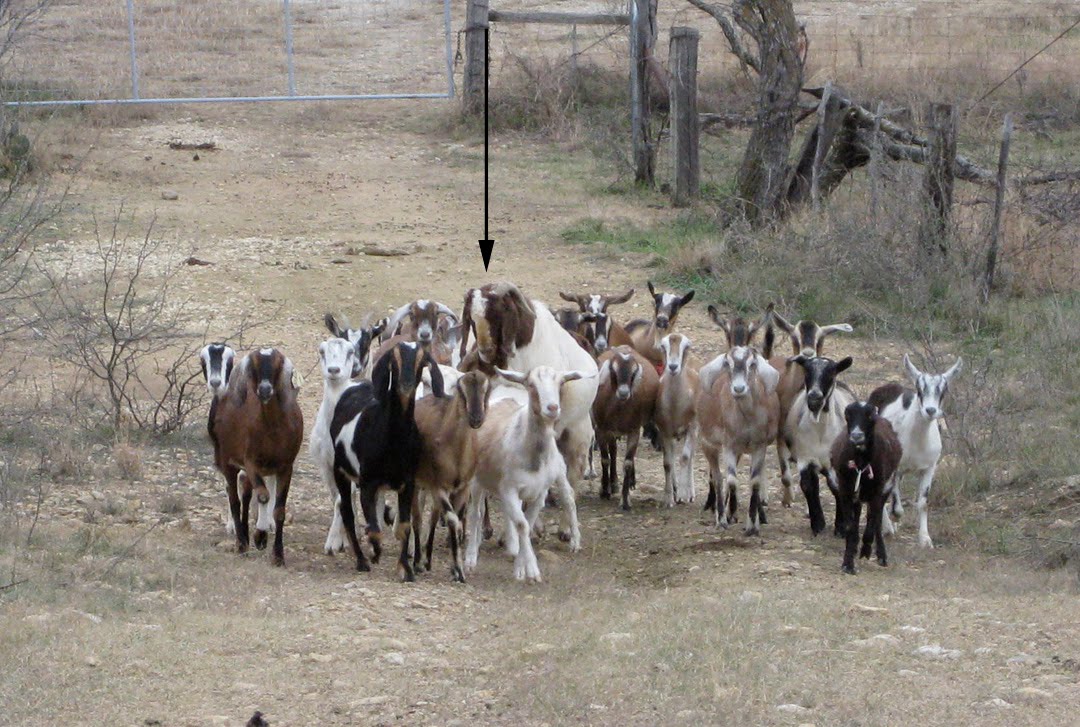
Then it was time to feed the goats!

SO funny... when we came around the corner (before the goats heard us), we noticed one goat on top of another goat. *ahem*

"Are they doing what I *think* they're doing?!?!??"


Umm... yes. And even a stampede of other goats could not break them up! ;-)
After the dust had settled, so to speak, the poor white goat got pushed all around. Err... yeah. Caught in the act! ;-)
They composed themselves and joined the others. I'm sure their date resumed later when the "kids" were asleep. ;-) (Kids. Get it?! Get it?! Tee hee. :-p) Ahh... good times.

And one last photo of the cutest goat I'd ever seen...

Seriously, wanted to take him home!

But not really because goats eat things like... umm... shirts and blankets and... scrapbooking paper, I'm sure. :-p

And that was my day at the ranch! Hopefully, I'll get to go again. It was pretty fun! :-)

Saturday, April 23, 2011

Scrapping!

I really haven't done a lot of scrapbooking posts in the past... umm... eight months?! After my miscarriage in September, I just didn't feel like doing *any*thing crafty. And it was really hard to get back into it. Ironically, this was the first project I decided to do:

It's a pregnancy journal, and I'm totally excited about it! I've already added photos to the first five months (okay, one photo is missing... :-p ), and I did take notes, so I just need to add those to the insides of the envelopes. I'm totally stoked to see it finished and have it to look back on. :-)


Then I did a layout with some old and new Jillibean Soup...
Those photos are actually from when we went to NYC in 2006!!! Crazy I'm finally scrapping them! ;-) That was our Christmas card photo that year (I just LOVE the colors... and my super-cute hubby ;-), and this photo of the puppies is one of my favorites EVER! They LOVED Central Park. LOVED it. We let them off the leashes a few times, so they could run and play, and they had a blast!

{Inspiration for that layout came from this pillow at LL Bean Home.}

And this is my newest layout. I just did this the other day...
My sweet Ruby. :-) She really is the cutest and sweetest dog ever. Truly. :-D I used this month's SC Singin in the Rain kit. I did use some white Mister Huey though to tone it down a bit. I like how soft it ended up being. :-)

Oh! And the inspiration for the design of the layout came from cards I saw at Tokketok.

Thanks for stopping by to see my new projects!

Friday, April 22, 2011

Loving My Sister.

My sister needs a blog.

Badly.

Not only does she have style...

But she's totally crafty (she made that flower on her bikini bottoms to match the top!), an awesome photographer, a super-mom (due with her fourth... the same week as I am!!!), and she finds the most amazing deals at consignment stores/thrift stores/vintage stores. Her ENTIRE house is DIY on a dime. I love it. She's so inspiring.

And soon... she WILL have a blog. She will. If I have to drag her to Blogger... kicking and screaming. :-)

Seriously... how beautiful is she?!?!

Thursday, April 14, 2011

Creating Baby's Inspiration Boards.

I don't think I ever would have thought to do inspiration boards. But they are SOOOO helpful! Now I love doing them because it helps me stay focused on color schemes and themes.

These are my boards for the baby's room. (Sorry, I can't make them bigger... perhaps looking at them on my Olioboard page will make them bigger!) I created these ones at Olioboard, which I now MUCH prefer over Polyvore. So much more user-friendly. :-D

This one is the unisex version, since we're having a surprise. We will leave it like this if it's a boy...

Or change it up a bit (add in some peach and coral accents) if it's a girl...
Both have the same main elements (including white furniture, grey IKEA rug, and the paint color for the walls). And I am doing a *very* loose Disney theme either way (art, mobiles, etc). LOL. I wasn't going to do a theme at all, but I really want art on the walls... and I'm a *huge* Disney fan. Hubby would only go along with it if the artwork is either vintage or black & white. I'm going to try for both. But if it's modern Disney characters, but still black & white, I think we'll both still be happy. :-)

I'm trying to DIY as much as possible since our budget is close to non-existent. We already have the crib and the rocking chair (that looks almost exactly like that one!), and I'm giving makeovers to wall art (frames and stuff not generally used to hang on walls...), a lamp, and a side table (all of which was free and/or we had on hand). This way we can keep costs down, and I much prefer the look to things that I make/re-do myself. :-)

I'll keep you posted! :-D

ETA: I do LOVE Steamboat Willie art, but I haven't yet decided if that's the route I want to go. We'll see. ;-)

Friday, April 8, 2011

Labeling.

I didn't used to label everything. I felt like I knew where everything was, where everything belonged.

Then I got smart. LOL.

Now I label *everything*. Even if I know where something is, I've realized that when I have labels, I get to it faster, and it just looks pretty. ;-) (Not just in my scrap room, but other places in my home too. The pantry, the fridge (!!! LOL), the linen closet, the laundry room, the master closet, etc.) But here are some of my favorite labeling places in my scrap room.

My blue baskets... I got a whole box of little white tags (from Staples or any office supply store), and I removed their white strings and just tied some red gingham on them. (This blue basket no longer holds these 6x6 pads, but I still have the same labeling in effect.)

These red and orange boxes. I have SOOO many of these (in three colors) all over my scrap room. I use the SAME blue cardstock for each label to give them a bit of unity (plus my own handwriting... tee hee).

My blue vintage suitcase that holds my paint? It totally needed a cute label, so I used an SEI ticket, some twine and some alpha stickers.

Okay, I lied. Not ALL the Container Store boxes have blue tags. LOL. I thought it would be fun to put some of my favorite patterned papers (these are October Afternoon). The two colored ones are memorabilia, and the one with a newspaper-looking label? It holds newspaper clippings of family members and memorable events. You could also use this method for holding colored papers and such. No actual "title" or "label," but just the "color" of what's in there.

My scrapbook albums have SUPER quick and easy labeling. These are those rimmed tags you can get in a box at the office supply store. I just used a punch to punch out circles from cardstock and write the title. They're stuck on with glue dots. See? Easy and fast. :-)

*Sometimes,* I like to get all crazy crafty with my labeling. ;-) These labels were just punched, and then I used paper clips and twine to attach to the drawers. This idea is loosely based off of Stacy Julian's method of how she labels her albums.

They are my embellishments by color, so I also added some of my favorite coordinating-color embellishments.

I thought long and hard (heeee ;-) ) about how I would label my photo drawers. I wanted something... umm... not boring? LOL. I got these vintage (from Kentucky!) mini-postcards from a long ago Studio Calico kit. I cut them to size to fit in each of the four drawers' book plates. I just added mini stickers for the titles.

One of my favorite storage items in my scrap room are these canvas bins. I'm kinda obsessed with these. I'm not even kidding. I have EIGHT in my scrap room (I will add two more at the end of this year, I think... LOL). I also have them in our linen closet (for sheets, pillowcases, first aid stuff, dog stuff, etc), guest bathroom (towels), and they WILL go ;-) in the baby's room (in lieu of drawers).
The labels? Are Sassafras linen cards! I don't even have to trim them (YES!!!!!)... they fit *perfectly* in that little label pocket! Then I use mini alpha stickers (all in black to keep it unified) to identify the contents. :-) Here's a close-up:

And those are just some of the fun ways I use labels in my scrap room. I *do* own a label maker, but I only used that to label my Cropper Hopper folders.

So have you gotten creative with your labeling? I'd love to hear some of your ideas! :-D

Saturday, April 2, 2011

Re-working Our Closet

I shared our closet here after we moved into our new house. But after living in it for a while, I discovered that there were a few changes I wanted to make. So... I thought I'd share them. :-)

My scarves used to hang on a pants hanger (which did work great for taking up little space!), but I realized that I hardly ever wore them because I couldn't really *see* them all, and they hung in the way back with my other long-hang stuff (dresses). So I got some new hooks and attached them to the shelf above and hung them right next to me belts:

I really like them like this! I can see all of them now, AND I wear them more. YES! Also, our hamper used to live where that step-stool is, so I just moved it to Jeremy's side of the closet. :-) This way the step-stool is RIGHT under the top bins and my dress shoes (that live in these on the top shelf), which also creates easier access. Double YES! :-D

And I replaced the shelf with this elfa shelf basket to hold my purses! My necklaces have always hung here too, but I've just never showed a photo. LOL. :-p

Then above my purses, you can see my bins o' stuff. ;-)

Here's a close-up. I switch them around depending on what season it is. But that hand wash bin?! That one always stays here. I used to just throw them in a pile or throw them in the hamper, hoping I'd catch them on laundry day. HA! I LOVE this solution. If you have hand-wash-only items (or simply items that are machine-wash, hang-to-dry), I *highly* recommend a special bin for them. Ahhh... makes my life so much simpler. I put bras here too. :-)

The other bins hold hats, slipper socks, and gloves/beanies. I also have one to the left of the purses, and that one holds my slippers. :-)

And those are the changes I've made! I'm loving how much more functional it's become!

Any cool ideas for organization in your own closet?